Tcache Attack中的Tcache Poisoning(基础)

附件下载:

链接:https://pan.baidu.com/s/1cCflSuwhgQoiiGzjcoZuBA
提取码:2g1k
–来自百度网盘超级会员V3的分享

原理

tcache poisoning的基本原理是覆盖tcache chunk的next域(tcachebin的链表指针是指向下一个chunk的fd字段,fastbin的链表指针式指向下一个chunk的pre_size字段)为目标地址,通过maloc来控制任意地址。这种攻击手法不需要伪造任何的chunk块。

Demo

源码test.c:

1
2
3
4
5
6
7
8
9
10
11
12
13
14
15
16
17
18
19
20
21
22
23
24
25
26
27
28
29
30
31
32
33
34
35
36
//gcc -g -fno-stack-protector -z execstack -no-pie -z norelro test.c -o test
#include <stdio.h>
#include <stdlib.h>
#include <stdint.h>

int main()
{
setbuf(stdin, NULL);
setbuf(stdout, NULL);
size_t stack_var;
printf("定义了一个变量 stack_var,我们想让程序 malloc 到这里 %p.\n", (char *)&stack_var);

printf("接下来申请两个 chunk\n");
intptr_t *a = malloc(128);
printf("chunk a 在: %p\n", a);
intptr_t *b = malloc(128);
printf("chunk b 在: %p\n", b);

printf("free 掉这两个 chunk\n");
free(a);
free(b);

printf("现在 tcache 那个链表是这样的 [ %p -> %p ].\n", b, a);
printf("我们把 %p 的前 %lu 字节(也就是 fd/next 指针)改成 stack_var 的地址:%p", b, sizeof(intptr_t), &stack_var);
b[0] = (intptr_t)&stack_var;
printf("现在 tcache 链表是这样的 [ %p -> %p ].\n", b, &stack_var);

printf("然后一次 malloc : %p\n", malloc(128));
printf("现在 tcache 链表是这样的 [ %p ].\n", &stack_var);

intptr_t *c = malloc(128);
printf("第二次 malloc: %p\n", c);
printf("Finish!\n");

return 0;
}

编译命令:

1
gcc -g -fon-stack-protector -z execstack -no-pie -z norelro test.c -o test

pwngdb调试

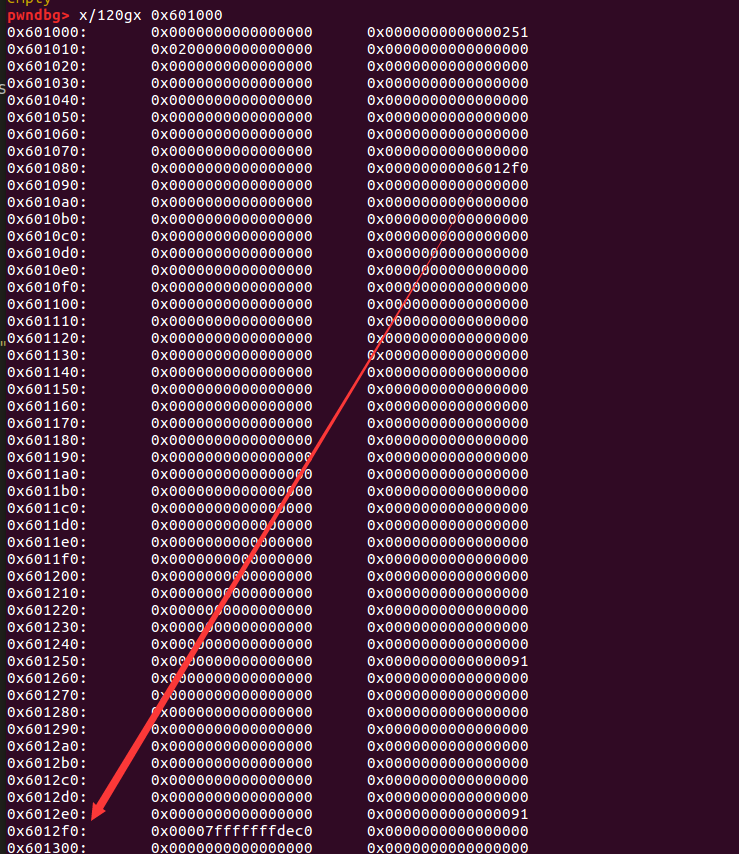
在第23行下断点,执行程序,此时程序已经释放了两个chunk,看一下堆内存:

image-20230813102446684

image-20230813102807760

image-20230813102738347

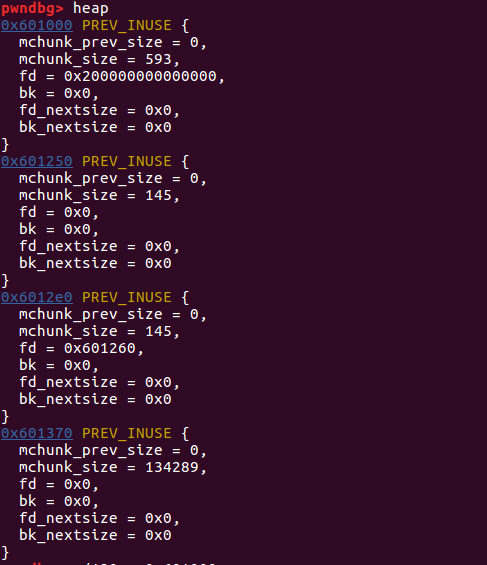
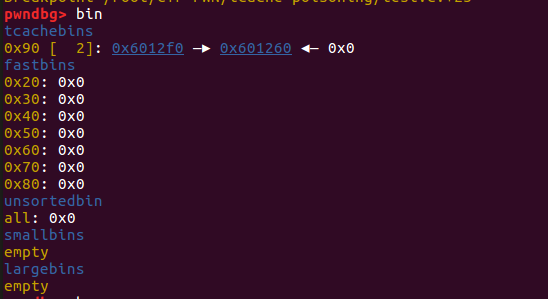
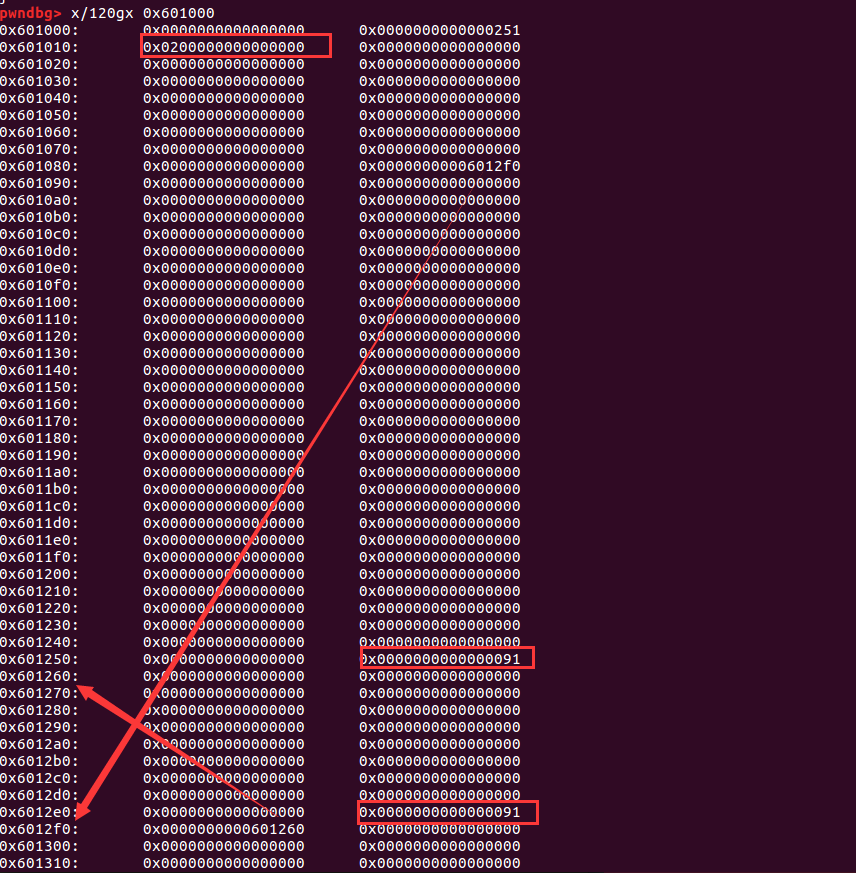
可以看见正好对应了tcache bin中的链表结构。
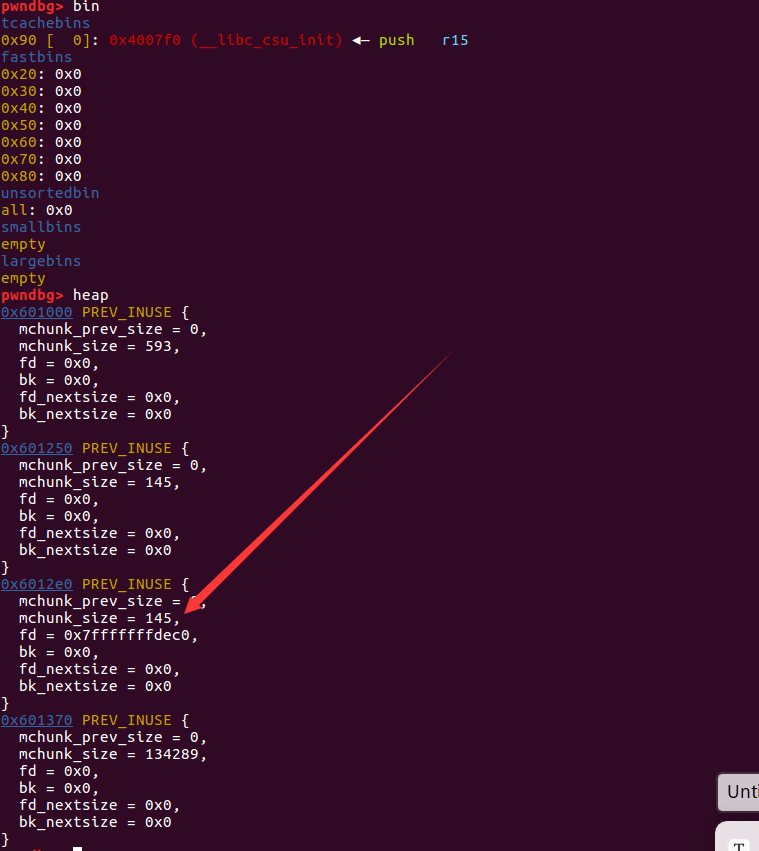
然后就是修改tcache的next指针(这一步骤是攻击方式的核心

在代码第26行下断,执行程序,观察堆的情况:

image-20230813103620048

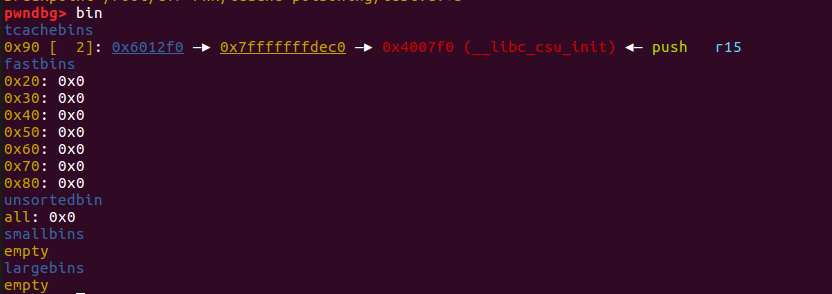
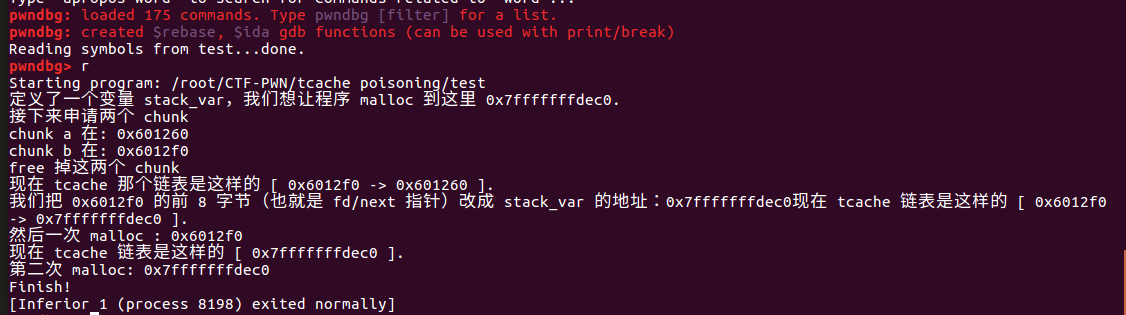
可以看到此时已经被修改为0x6012f0->0x7fffffffdec0(要控制的地址,在这个例子中就是&stack_var)

image-20230813103905316

最后再执行两次malloc就会控制想要控制的地址:

image-20230813104202181

image-20230813104314497